Units:Design: Difference between revisions
No edit summary |
No edit summary |
||
| Line 12: | Line 12: | ||
<center>'''Here goes Proposed Basic Unit Idea'''</center> | <center>'''Here goes Proposed Basic Unit Idea'''</center> | ||
The unit will be a "light Anti-Air Tank". | |||
Prolly this can go in lvl1 labs. | |||
I like the idea of small missiles chasing planes, launching fast, but not very powerfull. Good for taking scouts down. | |||
On this subject you must sketch. | |||
*Sketch | *Sketch | ||
| Line 21: | Line 30: | ||
<center>'''Here goes sketches based in first step'''</center> | <center>'''Here goes sketches based in first step'''</center> | ||
here the basic thank thread i drawn, it guess its basic enough, its not intended to have moving tracks. | |||
[http://i36.photobucket.com/albums/e35/6u0W/base.jpg] | |||
here are some variations to the turrets, it was supposed to have 2 missile racks.. | |||
[http://i36.photobucket.com/albums/e35/6u0W/var01.jpg] | |||
Later decided i liked more a central turret only. | |||
[http://i36.photobucket.com/albums/e35/6u0W/var02.jpg] | |||
And here the final assembly. | |||
[http://i36.photobucket.com/albums/e35/6u0W/final01.jpg] | |||
A completed unit draw is missing, maybe later. | |||
Keep in mind its Basic stuff. | |||
*More sketch | *More sketch | ||
Revision as of 22:56, 12 April 2006
resume:
- Idea
Is what kick starts your unit.
It can range from a simple tweak to one existing unit to a new unit from scratch.
But dont lose much time in this, just remember at some point you have to "think" in what you want to do.
In this tutorial we will work from this basic idea:
The unit will be a "light Anti-Air Tank".
Prolly this can go in lvl1 labs.
I like the idea of small missiles chasing planes, launching fast, but not very powerfull. Good for taking scouts down.
On this subject you must sketch.
- Sketch
Nobody *knows* how to sketch. You must give it a try and you will improve and learn.
A sketch IS NOT a cool drawing, its just a basic guideline. It helps get things clear to start modelling. Sketching can help you soldify your unit idea, so if it helps do it, other wise it is an optional step.
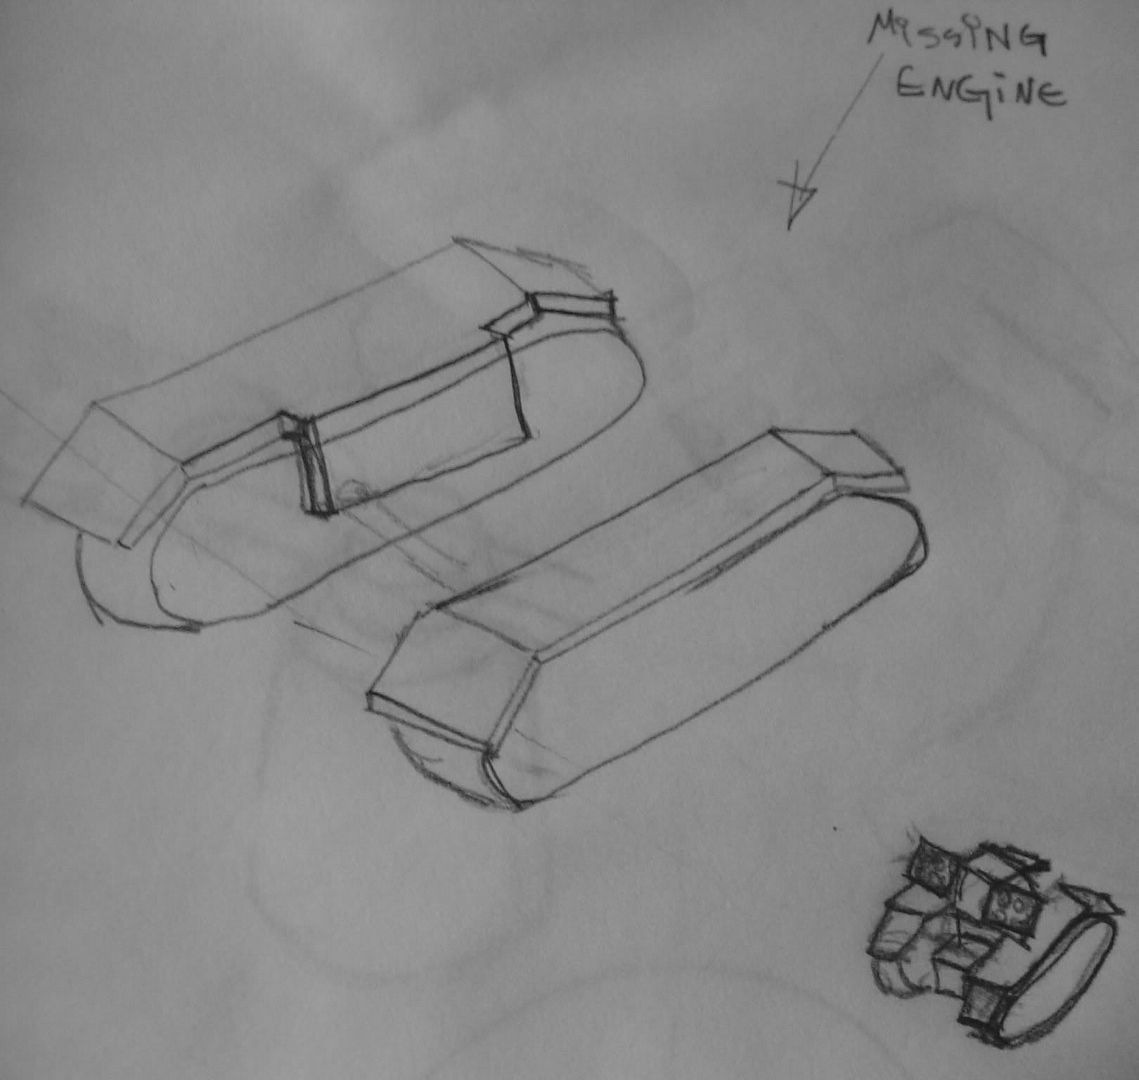
here the basic thank thread i drawn, it guess its basic enough, its not intended to have moving tracks.
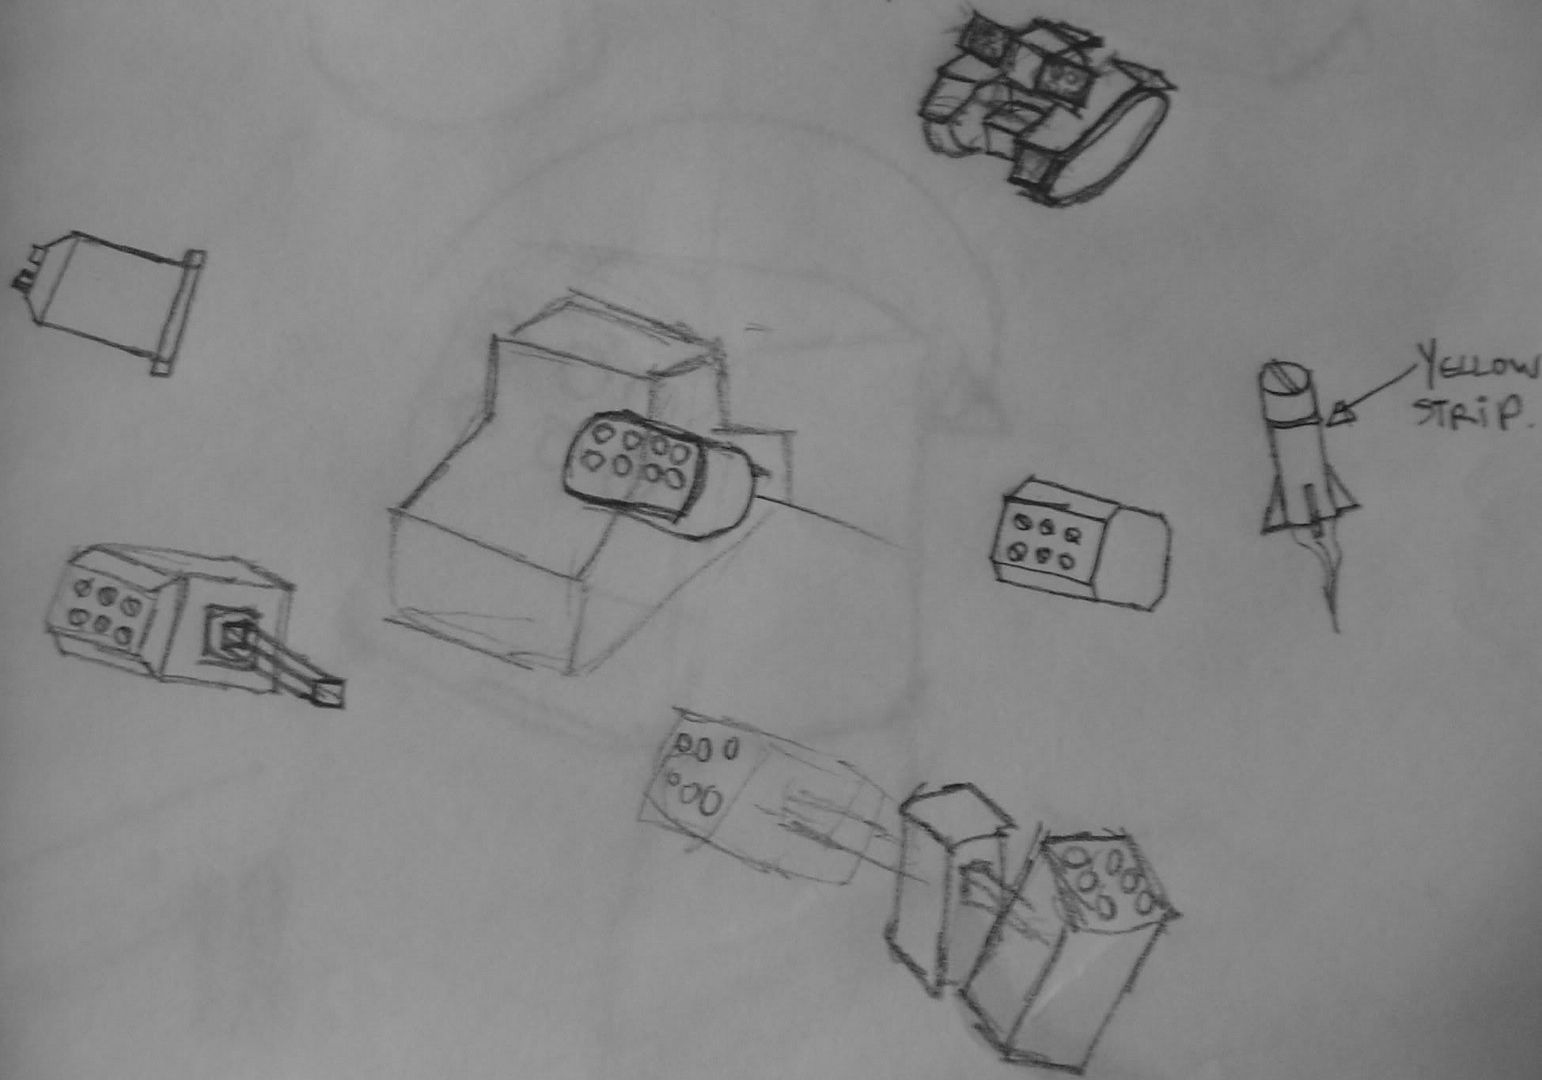
here are some variations to the turrets, it was supposed to have 2 missile racks..
Later decided i liked more a central turret only.
And here the final assembly.
A completed unit draw is missing, maybe later.
Keep in mind its Basic stuff.
- More sketch
Once you get a basic sketch that you like, try to improve it, make more sketches of this concept, get the idea more rounded.
- Model (tests can be done at this stage)
Here is where you put the sketches to real use. you will appreciate the dirty lines you did earlier.
First thing to do is get familar with which ever 3D modeling program you are using. There should be tutorial avalable for the differnt functions or ask around. Once you know how to use it, you can make your model.
Keep the final product of your unit in mind, such as which parts need to be animated. If you want to animate a tenticle you are going to need several segments (differnt objects) to get it to look right.
Once you have your model, you need to UV map it. This requires you to map out the seems of the modle, and designate which parts of it go were. Unfortnatly you have to get it all on one map, is the unit needs to be one model when you UV map it. You 3D modeling program may give you the option to temparaly combine the model into one unit for this purpose. If not, export it as an obj (the whole model) which will turn it into one unit. reload it and UV map that (with out changing any of the model). You can also us UPspring (the program that makes your models into .s3o files for springs use) to spit out an obj of your finished unit.
Once you have your unit mapped, its time to mess with the file. You will most likly need to tell your 3d modeling program to make the file external. save it as a tga. after that the first thing you should do is copy it. It turns out you need two versions of your UV map in order to use all the nifty skinning features, so you may want a copy, although you don't need it, better to have it and not need it. . .That being said, lets move onto the skinning.
The tga file will need to be opend with a program like gimp (free ware). When you do open it, go ahead and texture it to the best of your abilities, once done, any area you want to have team color needs have modifications done to an alpha channel. You can add this with your gimp/photo shop/something type program. You will likly need to first add the alpha channel, then get the program to display the differnt channels of the picture. Alpha is in grey scale, in gimp every thing you make colored in the Alpha channel will be the side color. The darker it is, the more like a solid color that spot will be. Every thing else (in gimp at least) needs to be erease (just in the alpha channel, NOT the rest of the channels) in order for your true texture to show up. This makes it so the only parts of the unit you can see are the ones that are going to have team color on it.
Next, you need to load up your model with UPspring, and load in your textures to the unit. The first texture is the basic texture. The second texts atributes will be talked about later(when I feel like posting more stuff). Once those are loaded up, go ahead and look at your model, pretty huh? well now you need to flip the loaded UV map. Go to texture mapping and select show UV texture, then tell it to flip. you model looks like it when through a blender now right? well thats fine it will show up correctly in spring.
Last but not least, you want to go estimate the size of your unit. its the tab farthest to the left. just fill in all the boxes and valla! your unit will look as snazy as you managed to model and UV map it.
- Animation
- Scripting
- Setting up for hard testing
at some point goes user feedback aswell.